Howto Postman
The easiest way of structuring and reusing different test in Postman is to switch from ‘History’ to ‘Collection’ which can be found in the left side of the Postman GUI. One advantage is that configuration like authentication can be inherit and not configured for each test.
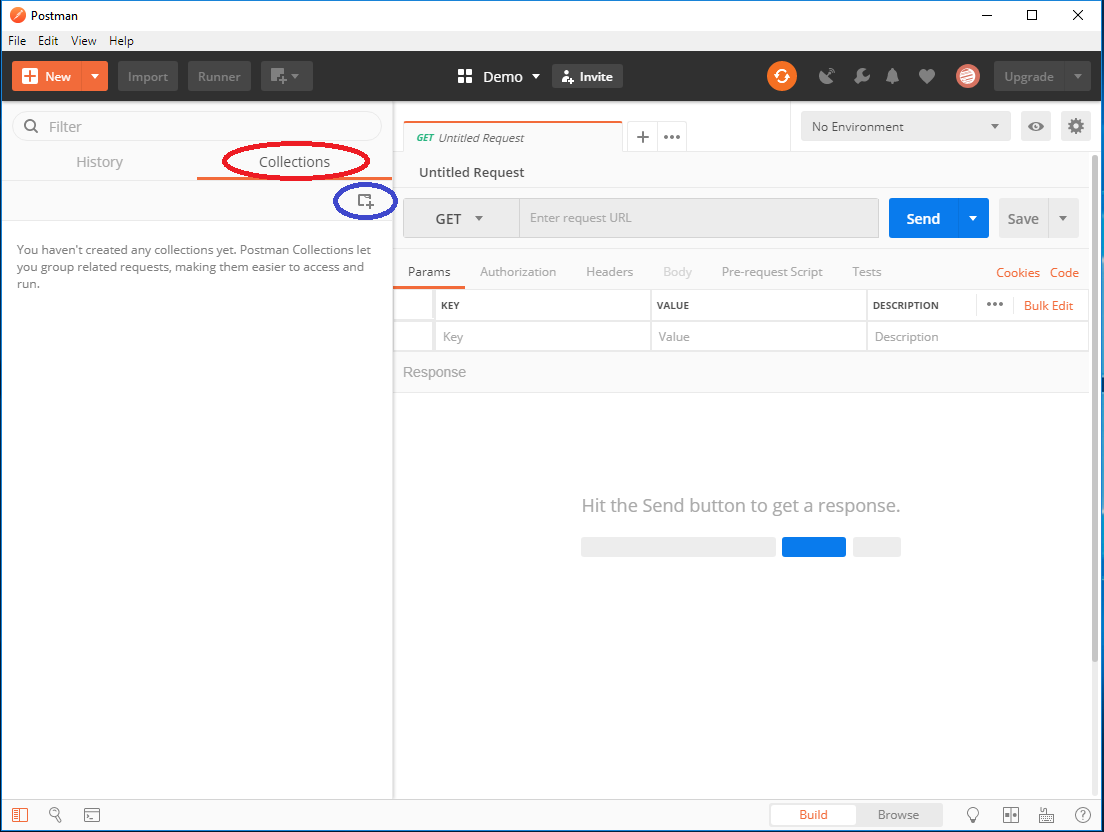
Creating the Collections
The initial steps are as follows:
- Create the ‘config’, ‘jobserver’ and ‘portserver’ collections
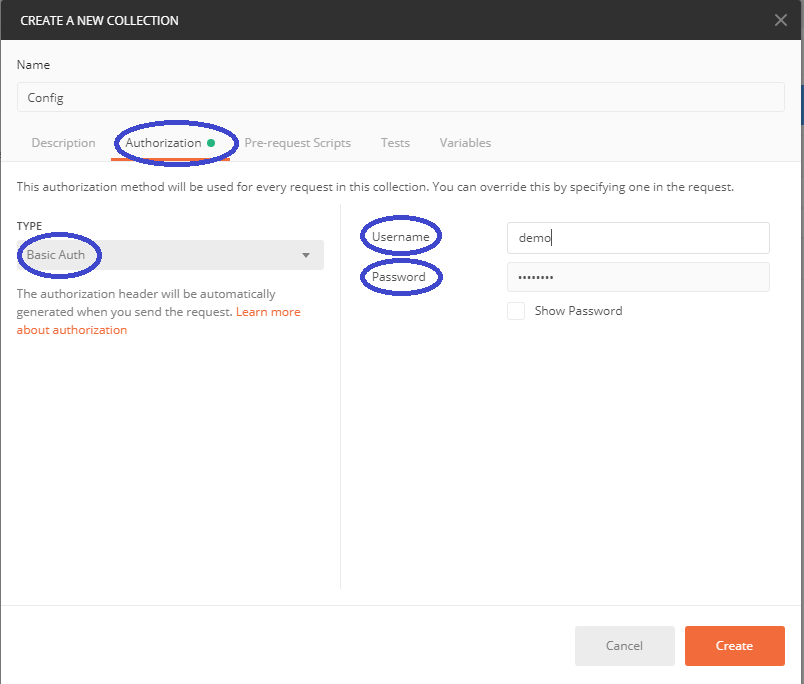
- Click on the ‘New collection’ – Encircled in blue – and follow the wizard / guide
- Specify the name
- Select the ‘Authorization’ tab
- Select ‘Basic Auth’
- Specify the user and password
- Click ‘Create’
Creating a simple Get request
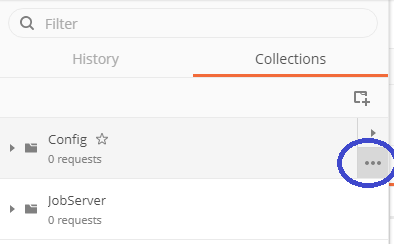
- Move the mouse pointe / cursor to the create ‘config’ collection and the ‘…’ appears – here highlighted in blue
- Click and select ‘Add Request’
- Name the request ‘/api/config/shiplist/’
- Add ‘Get all shiplists’ as description
- Select ‘Save to config’
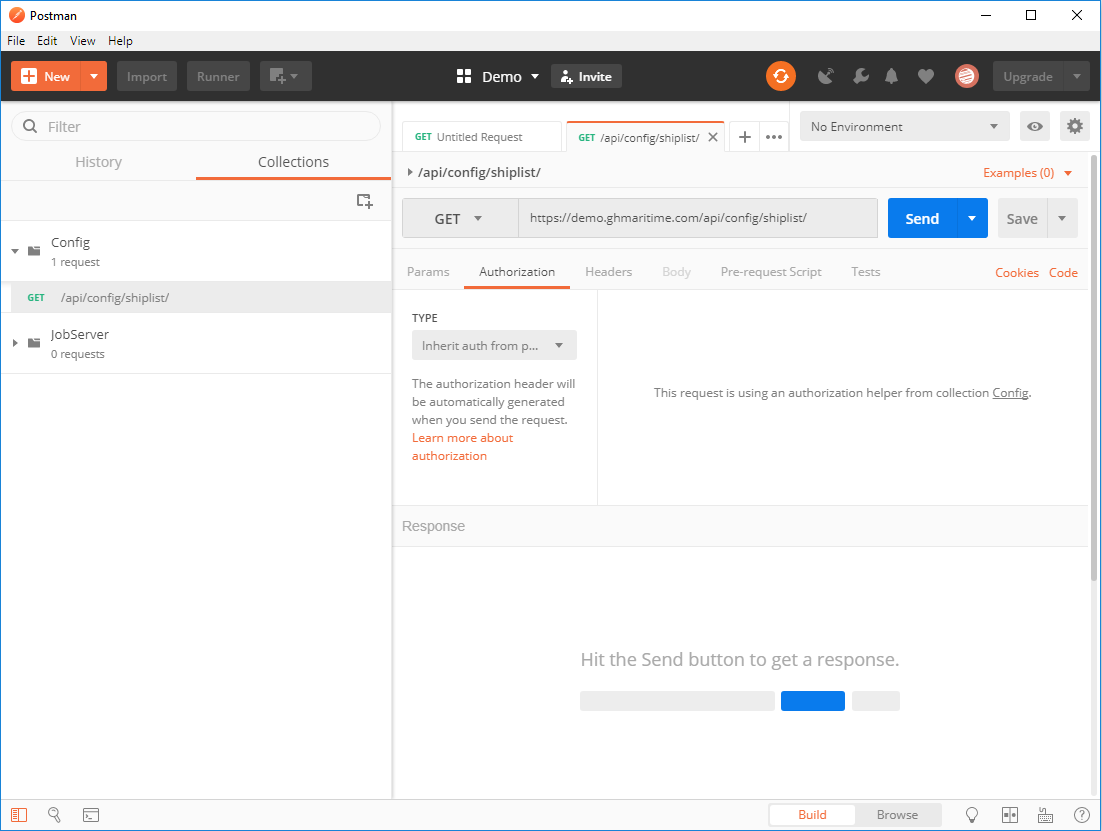
- Duple click or right click and select ‘Open in new tap’ on the created request
- Enter ‘HOSTNAME/api/config/shiplist/’ as request URL – where the HOSTNAME must be changed to either the system DNS name or the system IP which is the same as when you use aisweb
- Ensure that the type is ‘GET’
- Ensure that Authorization is to ‘Inherit from Parent’
- Click Save
- Click Send
The result:
Creating a POST request / Area report
- Click on ‘jobserver’
- Click on ‘…’
- Click and select ‘Add Request’
- Name the request ‘/api/jobserver/stat/area’
- Add ‘Start an Area report of all ships in an area’ as description
- Select ‘Save to jobserver’
- Duple click on the create request
- Change the type to ‘POST’
- Type ‘HOSTNAME/api/jobserver/stat/area’ – where the HOSTNAME must be changed to either the system DNS name or the system IP which is the same as when you use aisweb
- Ensure that Authorization is to ‘Inherit from Parent’
- Click on ‘Body’
- Click on ‘raw’
- Click on type which is set to ‘Test’ and change the type to ‘JSON (application/json)’
- Enter / copy and paste the following as body payload
{
  "begin": "2018-05-20T00:00:00Z",
  "end": "2018-05-25T00:00:00Z",
  "name": "Area report, ships at Esbjerg",
  "shape": {
    "coordinates": [
      [
        [
          7.57116174697876,
          55.63876724243164
        ],
        [
          8.301753044128418,
          55.64806747436523
        ],
        [
          8.587397575378418,
          55.38994979858398
        ],
        [
          7.73046350479126,
          55.0263671875
        ],
        [
          7.57116174697876,
          55.63876724243164
        ]
      ]
    ],
    "type": "Polygon"
  },
  "group_by": "ungrouped",
  "interval": "day"
}
-
- Click Save
- Click Send
- The REST will respond with an ID of the request – in this case 1447352729618333
Getting the Area result
- Click on ‘jobserver’
- Click on ‘…’
- Click and select ‘Add Request’
- Name the request ‘/api/jobserver/stat/area/result’
- Add ‘Get the Area result’ as description
- Select ‘Save to jobserver’
- Duple click on the create request
- Change the type to ‘GET’
- Type ‘HOSTNAME/api/jobserver/stat/area/result/1447352729618333’
- where the HOSTNAME must be changed to either the system DNS name or the system IP which is the same as when you use aisweb
- ID shall be set to the ID from before. In this case 1447352729618333
- Ensure that the type is ‘GET’
- Ensure that Authorization is to ‘Inherit from Parent’
- Click Save
- Click Send
The result:
The output format can be changed to be with clicking on ‘HTML’ and select ‘JSON’
Getting the list of reports
- Click on ‘jobserver’
- Click on ‘…’
- Click and select ‘Add Request’
- Name the request ‘/api/jobserver/stat/statistic’
- Add ‘Get the Area result’ as description
- Select ‘Save to jobserver’
- Duple click on the create request
- Change the type to ‘GET’
- Type ‘HOSTNAME/api/jobserver/stat/statistic’
- where the HOSTNAME must be changed to either the system DNS name or the system IP which is the same as when you use aisweb
- Ensure that the type is ‘GET’
- Ensure that Authorization is to ‘Inherit from Parent’
- Click Save
- Click Send
The result:
The report 1447352729618333 is listed as running.
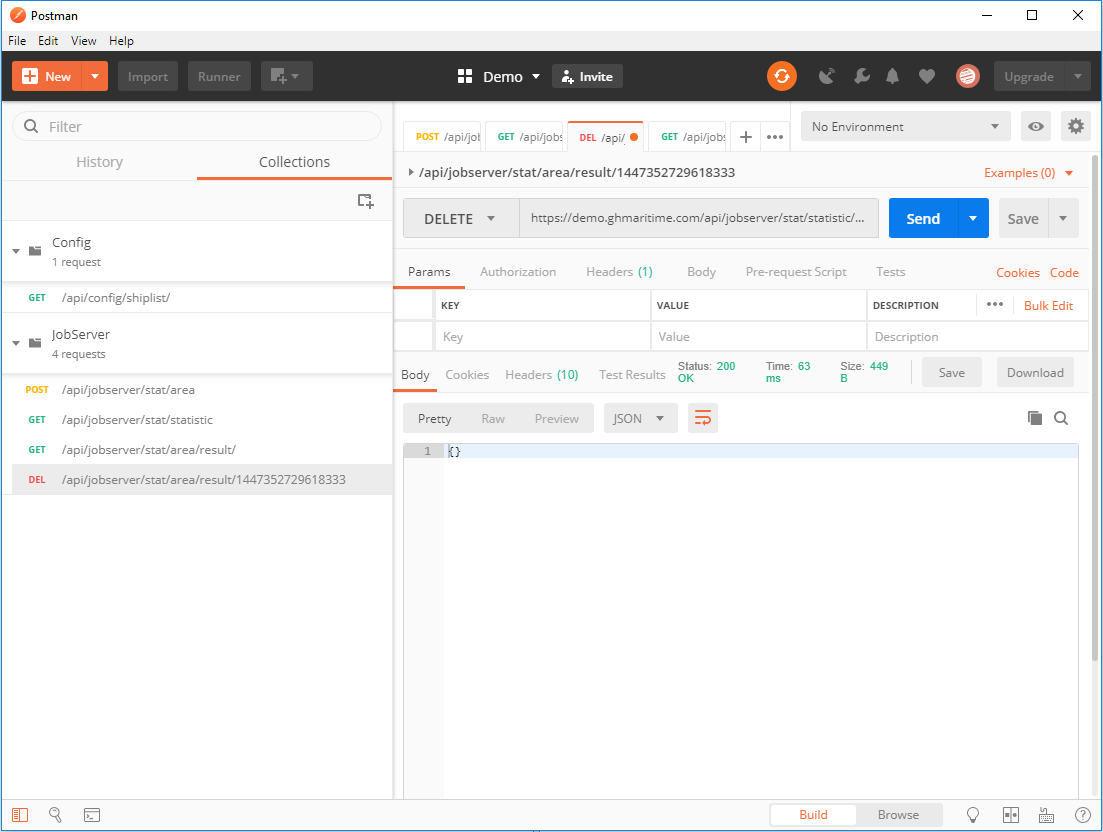
Deleting a report
- Click on ‘jobserver’
- Click on ‘…’
- Click and select ‘Add Request’
- Name the request ‘/api/jobserver/stat/statistic’
- Add ‘Get the Area result’ as description
- Select ‘Save to jobserver’
- Duple click on the create request
- Change the type to ‘DELETE’
- Type ‘HOSTNAME/api/jobserver/stat/statistic’
- where the HOSTNAME must be changed to either the system DNS name or the system IP which is the same as when you use aisweb
- ID shall be set to the ID from before. In this case 1447352729618333
- Ensure that the type is ‘GET’
- Ensure that Authorization is to ‘Inherit from Parent’
- Click Save
- Click Send
Updated on 23 September, 2024

